Figuring out how to declutter paper piles gets a lot easier when you stop treating every stack like a separate emergency. The pile on the kitchen counter, the papers on your desk, the mail by your favorite chair, the stuff beside your bed… it’s all the same problem showing up in different places.
The worst part? You keep moving the papers around instead of actually dealing with them, and they keep multiplying.
One stack becomes three. Three stacks become a house full of unfinished paper decisions. And the more you think about dealing with the paper that’s EVERYWHERE, the less you want to start.
So we’re not doing a giant paper-sorting marathon today. We’re doing something much more realistic. No clearing the whole dining table for a massive sorting session that somehow never gets finished. No pretending you’re suddenly going to become a person who loves paperwork.
Just one basket, 10-ish minutes a day, and a simple system that helps you finally work through the paper mess. (Oh, and some tips to help you make sure this doesn’t keep happening…)
This post may contain affiliate links. If you choose to purchase through an affiliate link, I may receive a small commission at no additional cost to you. This post is not to be taken as professional medical or mental health advice. All statements are strictly my personal life observations. You can see my full disclaimer here.
Stop Trying to Deal With Every Paper Pile Separately
You can work through paper piles exactly where you find them, and sometimes that’s fine. But for most people, scattered piles make paper decluttering harder.
You clear one stack from the kitchen, but there’s still another stack on the desk. You sort a few papers near the couch, but there are more by the bed. You recycle half a pile from the dining table, but now you’ve uncovered papers that need action. And those ‘sorted’ piles somehow just turn into additional permanent piles.
It starts to feel like you’re chasing paper around the house and just making a bigger mess.
Instead, for this one type of clutter, gathering first can help.
I know, I know… I usually tell you to declutter in place instead of pulling everything into a staging area.
This is a little different.
You’re not dumping everything onto the floor and creating chaos or holding sorted piles of items until you decide what to do with them ‘later.’ You’re putting the scattered papers into one contained spot so you can work slowly through the backlog.
Here’s the actual process…
Step 1: Gather All Your Random Paper Piles Into One Basket
Gather ALL papers that are randomly scattered.
Kitchen counters. Dining table. Next to your bed. On and around your desk, unless you’re actively working with them. Near the couch and/or your favorite chair. That place where mail sometimes gathers.
ALL the places.
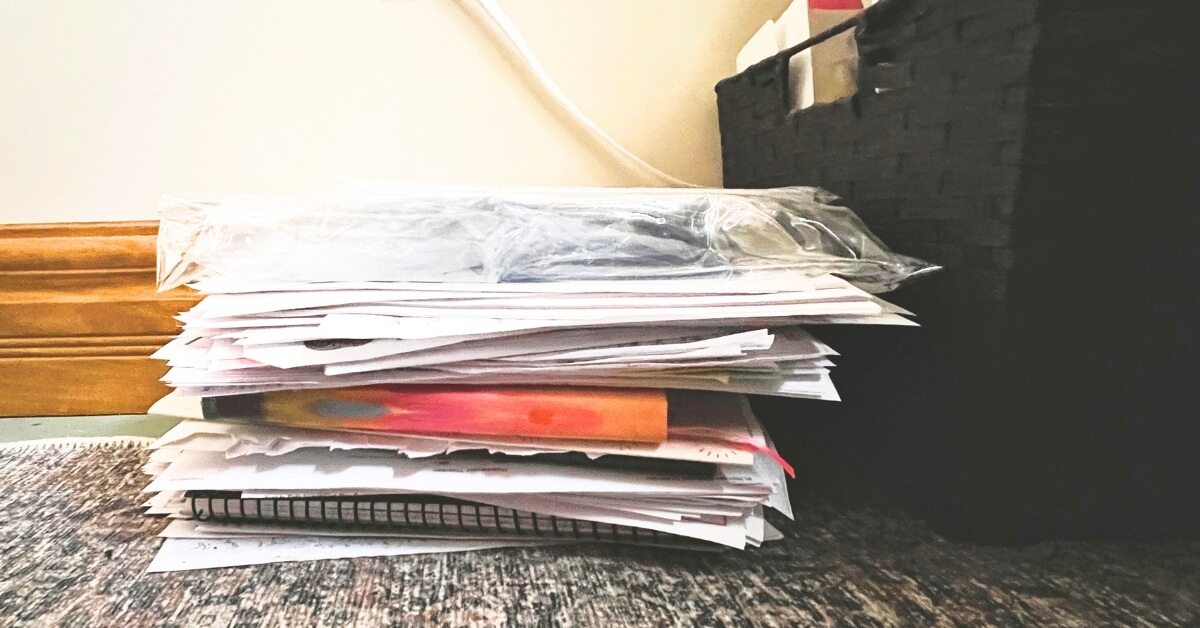
Put everything in a bin, box, or basket.
I used a square laundry basket, which actually helped me work through this process faster because it was pretty inconvenient to not have that basket available for laundry.
You may even need a couple of boxes depending on their size and your number of paper piles.
Place the most recent piles and papers on the top.
That part matters because the papers near the top are more likely to need current action. You don’t want an appointment reminder from this week buried under a stack of papers from six months ago.
This is also where you get a quick visual win. Your counters, tables, and random paper spots look clearer right away, even though you still have work to do.
Now you need a way to work through the basket without wearing yourself out.
Why This Is One Time It Helps To Gather Everything First
Most of the time, I prefer decluttering in place. But when you’re dealing with paper piles, gathering them into one basket or box does a few useful things.
First, it stops the scattered-paper problem. You’re no longer trying to remember where every pile is.
Second, it gives you one place to start tomorrow.
Third, it helps you see that this is a temporary project, not your new paper storage system.
That last part is important.
The basket is not where papers live forever. It’s just where the old random piles go while you’re working through them.
In the meantime, you’re going to want to begin practicing the habits necessary to stop those piles from forming again, some of which I cover in my post about paper organizing tools.
But for this post, we’re staying focused on the pile-clearing part.
Here’s how to make that part doable…
Step 2: Work Through Your Basket for 10 Minutes at a Time
It’s extremely unlikely that you’ll be able to declutter ALL of this paper in one sitting, or even one day. It gets exhausting, and I don’t want you to burn out.
Your goal should be to sort papers for about 10 minutes at a time.
Start at the top of the basket so you’re working through the most recent piles and papers first. Those papers are more likely to include current bills, forms, appointment reminders, or anything else that may need attention soon.
You can do a little more if you’re up to it, but don’t push beyond your personal limits.
This is one of the most helpful tips for decluttering paperwork because paper sorting takes more energy than people expect. It’s not just picking things up and moving them around. You’re reading, deciding, sorting, and sometimes finding tasks you’ve been avoiding.
Ten minutes may not sound like much. But ten minutes today is better than waiting for a free Saturday that never happens. And ten minutes a day can clear a surprising amount of paper over time.
Now let’s talk about what you actually do during those 10 minutes…
Step 3: Sort Papers Into 4 Simple Piles
Start at the top of the basket and begin sorting papers into four piles:
- Take Action
- File
- Recycle
- Shred / Burn
That’s it.
No detailed categories. No extra piles called ‘maybe’ or ‘someday’ or ‘deal with later.’ Those kinds of piles are how paper clutter gets a second life.
Keep the sorting basic so you can keep moving.
Here’s what each pile means.
Take Action
These are papers that need you to do something.
This is probably the most difficult part, because otherwise you would have taken care of those tasks immediately.
That doesn’t mean you’re bad at paperwork. It means these papers require energy, decisions, or time… and that’s exactly why they ended up in a pile.
File
These are papers you actually NEED to keep.
Not every paper you feel nervous about tossing. Not every paper that looks official. Not every paper you might maybe want someday. Not that recipe you printed out 3 years ago and haven’t thought about since.
Here’s a list to get you started.
For now, keep this pile as small and honest as you can.
Recycle
These are papers that don’t need to stay and don’t contain private information. A lot of paper clutter ends up here.
And that’s good news, because recycling is one of the easiest wins when you’re working on reducing paper clutter.
Shred / Burn
These are papers with private information. Shred them or put them in your burn pile if that’s how you handle private papers.
Paper shredders are relatively inexpensive, but they do take up space in your home. Other places you may be able to have your papers safely shredded include banks (some local banks offer limited paper shredding once or twice a year), office supply stores, or your waste management company (ours holds a document shredding event twice a year).
But don’t stop and leave those sorted piles sitting around. This next step is the part that makes the ‘no mess’ method work…
Step 4: Finish the 4 Piles Before You Stop for the Day
This is another reason you want to only work in short sprints.
Once you’re done with 10-ish minutes of sorting, you need to deal with those four piles, and you have to account for the time and effort that will require.
- Recycle the papers you can.
- Shred the private papers or put them in your burn pile.
- File the papers you ACTUALLY need to keep.
- Take action on anything you’ve previously thrown into a paper pile and avoided.
This is where a lot of people accidentally create a new pile called ‘I need to deal with this.’
Don’t do that.
Leave yourself time for the Take Action papers.
Pay the bill. Make the phone call. Send the email. Make the appointment. Whatever it is, do it now.
It will be good practice for dealing with incoming paperwork in the future so you don’t end up with this mess again.
This is also why the 10-minute sorting session matters. If you sort for an hour, then you may be too tired to handle the action items. If you sort for 10 minutes, you’re more likely to have enough energy left to finish dealing with the small sorted piles you created.
That’s the difference between truly decluttering paper and simply rearranging it.
Now let’s talk about what happens if your basket is full.
What If Your Paper Basket Is Huge?
Your basket might be packed. You might need two boxes.
You might look at the amount of paper and think, ‘This is going to take forever.’
Maybe it WILL take a while. That’s okay.
How long will it take to declutter all of your paper piles? I don’t know, but I can tell you that a very full square laundry basket took me about a month when I did this. (Also, I am VERY SLOW, so I didn’t get much done in each 10-minute session.)
That may sound like a long time, but think of it this way…
In a month, you could be down to ZERO random paper piles vs. thinking, ‘I don’t have time to do that’ and never getting rid of those piles.
That’s why this method works so well for decluttering paperwork. It doesn’t require a burst of motivation. It just asks you to come back to the basket again in a way that forms a simple habit.
One short session at a time, the basket gets smaller.
And because you’re learning to handle incoming papers at the same time, the counters stay clearer. The desk gets easier to use. The random stacks stop controlling every surface.
That’s the kind of decluttering inspiration that actually helps you keep going.
NOTE: If you’re dealing with a true paper hoarding situation – stacks as tall as you are, piles that prevent the proper use of a room, minimized walkways, etc. – then you may need to bring in extra help, even though I know the idea of someone else looking through your papers makes you cringe.
If that’s the case, then try this method first with as much as you can fit into a single basket. See how quickly you can make meaningful progress.
However, a house loaded with papers is simply dangerous (fire hazard, dust, potential mold and mildew, tripping hazards, etc.) and you need to put your health and safety first. The best option might be a professional who is trained to deal with your type of situation and who will respect your privacy.
Now let’s keep the goal very clear…
The Goal: Zero Random Paper Piles (and an Empty Basket)
The goal of this process isn’t a perfect filing cabinet. It’s not a full household paperwork system. Those things can come later.
The goal here is zero random paper piles.
No old stack on the dining table. No mystery papers by the couch. No papers all over desk surfaces. No mail pile sitting in the kitchen for weeks. No paper basket that becomes permanent storage.
Just dealing with new papers as they come in.
That’s a practical step toward clutter control and a calmer home.
If you’re also working on broader paper habits, you may want to read my post about how to organize papers without a filing cabinet and the post about paper organizing tools after you’ve made progress on the piles.
But don’t rush ahead.
For now, gather the papers.
Sort for 10 minutes.
Deal with the four piles.
Do it again tomorrow.
That’s how to declutter papers when the piles have been sitting around for far too long… and YOU CAN DO THIS.
Did you enjoy this post? Know someone else who might like it? Please take a moment to share on Pinterest, Facebook, or your favorite social media… (Click the sharing buttons at the bottom of the post.) Thank you!
Thank you.